Scrapbook chalk offers a fun and inexpensive way to embellish your layouts.
About Scrapbook Chalk
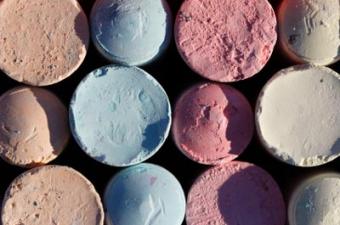
At first glance, the chalk sold at your local scrapbook store may not appear to be much different than the chalk your child uses for his/her school projects. However, scrapbook chalk is made to be acid-free and photo safe. In addition, the pigment in chalk designed for scrapbooking tends to be more concentrated than what is used in other types of chalk.
Although there are many different brands of chalk, the following seem to be among the most popular:
Using Chalk on Your Layouts
Adding chalk to your scrapbooking projects is a fairly simple process. Consider the following suggestions:
- Use chalk to add definition to die cuts and punches.
- Rub chalk on the raised part of embossed paper to add pizzazz to your page.
- Add chalk to vellum quotes for a soft and romantic effect.
- Create unique titles using letter stencils and chalk.
- Use chalk to add color to rubber stamped images or black and white clip art.
- Apply chalk over an image stamped in watermark ink for a rainbow look.
- Create an abstract design on plain cardstock to use as a unique background paper.
- Make a marbled background by filling a shallow pan with water and scraping several coordinating chalk colors onto the surface. Drop a piece of cardstock into the water and lay flat to dry.
- Use chalk to alter the look of old patterned paper so it makes a better match for your photos.
- Tint fibers or ribbons with chalk to create customized page embellishments.
- For a modern look on your next layout, shade the edges of a torn paper border with a matching color of chalk.
Scrapbooking chalk offers endless opportunities for creativity. Chalk can be applied with the cotton balls, cotton swabs, makeup sponges, and eye shadow applicators to create a number of different looks. Don't be afraid to experiment with various application techniques!
Tips for Working with Chalk
Using chalk on your scrapbook pages will be easier if you remember these simple tips:
- Apply your chalk lightly. You an always make something darker, but it's difficult to lighten a chalked image that is already too dark.
- Use a circular motion to apply chalk if you're trying to make an item look "fluffy." This technique works especially well for mimicking the look of a teddy bear's fur.
- Buy a special chalk eraser from an artist's supply store to make it easy to erase your mistakes.
- Since chalk dust tends to stick to everything in sight, apply chalk before gluing items to your page.
- Chalk dust will clog up markers and ink pens, so apply chalk after using these items on your page.
- Spray your finished chalk design with an acid-free fixative to reduce smudging and smearing. Avoid using hairspray, since the chemicals in this product will cause fading and damage to your photos.
- Whenever possible, use plastic sheet protectors on your chalked layouts to help prevent your chalk from accidentally transferring to other pages.
Caring for Your Chalk
Since one set of scrapbooking chalk will provide you with enough colors to decorate an entire album full of layouts, chalk is a great investment. To keep your chalk in top condition, however, you'll want to remember these tips:
- Store your chalk in a safe place to prevent breakage.
- To avoid getting chalk dust on your other scrapbook supplies, make sure the lid to your chalk set fastens tightly.
- Always use a different applicator for each color to keep chalk colors bright.
- Don't touch your chalk with bare fingers; the oil on your hands will contaminate the chalk.


